
Yay!!

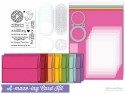
It’s time, sweet friends! The A-maze-ing Card Kit from My Favorite Things is finally available NOW and you can find it HERE in the Online Boutique! This kit is so freakin’ fun, and I just know you’re going to love every little bit of crafty goodness in your kit box! Here’s my final project for tonight’s release!

Okay, you all just knew I had to try some ink blending to accent the elements of the A-maze-ing Card Kit! Here’s how I created my project:
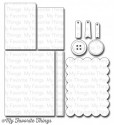
- Trim an A2, horizontal, top-folding card base from Smooth White Card Stock. Score at 4.25”, fold in half and perfect the crease with a Teflon Bone Folder.
- Die cut an image panel from Smooth White Card Stock using the rectangle die from Blueprints 1 Die-Namics.
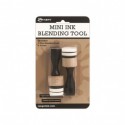
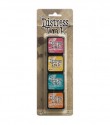
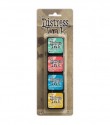
- Using a Mini Ink Blending Tool, blend some Twisted Citron, Mermaid Lagoon, Picked Raspberry and Mustard Seed Distress Inks onto a panel of Smooth White Card Stock. Trim a narrow strip from this panel to fit the the length of the image panel.
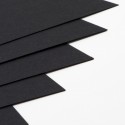
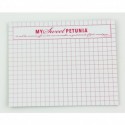
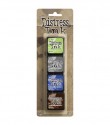
- Trim a narrow strip of Black Licorice Card Stock the length of the image panel. Stamp the sentiment from the You’re A-maze-ing Stamp Set using Sweet Tooth Pigment Ink, and heat emboss it with White Detail Embossing Powder.
- Die cut a circle from the image panel using the Circle Shaker Window Die. Temporarily position the image panel onto the card base. Use the circle aperture as a guide to adhere the black maze shape to the card base using Multi Medium Matte liquid adhesive.
- Die cut the Circle Frame Die from Smooth White Card Stock, and leave the resulting die cuts in place. Using a Mini Ink Blending Tool, blend some Twisted Citron, Mermaid Lagoon, Picked Raspberry and Mustard Seed Distress Inks around the circle frame die cut.
- Die cut the Circle Frame Die from double-sided adhesive. Adhere the die cut to the back of the image panel, around the circle opening. Adhere a Circle Shaker Pouch into the circle aperture.
- Die cut a heart from a scrap of the previously ink blended panel. Adhere it to the center of the Circle Shaker Pouch using tape adhesive. Adhere the ink blended circle frame die cut to the image panel, around the outside of the assembled circle shaker pouch, using foam tape.
- Adhere the sentiment strip to the rainbow strip using tape adhesive. Adhere the strips to the image panel using foam tape.
There you go, an a-maze-ing interactive puzzle surrounded by some ink blended rainbow goodness!! What more could a person want, right?!! I’ve listed and linked all of the products that I used below! The A-maze-Ing Card Kit is available for purchase HERE, so be sure and order yours NOW! Please click on through to the My Favorite Things Design Blog to be linked to the other genius projects that my teammates have created for your inspiration using the new A-maze-ing Card Kit! I assure you you’ll be utterly A-MAZED!!
That’s it for me today, friends! I’ll be back on Friday with more crafty goodness!! Until then, thanks so much for stopping by – I hope you’ll come back again soon!
PRODUCTS USED:

Fun card!
ReplyDeleteI love the color blending! So cute!
ReplyDeleteInspiring card. Great release!
ReplyDeleteNice pick of colors!
ReplyDeleteLove the ink blending. It is fabulous.
ReplyDeletePretty colors! Love your fun card with this awesome kit!
ReplyDeleteVery cool with the ink blended colors.
ReplyDeleteThis new kit has such great sentiments! Fun card!
ReplyDeleteWOW Karolyn, THIS is AMAZING! Really fabulous!
ReplyDeleteI absolutely love the way you blended the colors on this card.
ReplyDeleteI am loving the rainbow colors on this card!
ReplyDeleteSuch a cool card!
ReplyDeleteI love your rainbow color blending. It looks fabulous!
ReplyDeleteLove the way the black maze picks up the black sentiment strip. Another great card from Karolyn
ReplyDeleteThank you for always giving such good directions.
ReplyDeleteGorgeous looking created using the spectrum of the rainbow.
ReplyDeleteI like the blended colors added to this card.
ReplyDeleteLove the color blending! The black maze piece looks great here. Can't wait to receive my kit.
ReplyDeleteAbsolutely love the color combo for the wow factor! Great design Karolyn, thanks for sharing!
ReplyDeletegreat card. Love the blending of the colors!
ReplyDeleteAbsolutely amazing!
ReplyDeleteLove your very cute card!
ReplyDeleteFabulous card! Love this card kit! So many possilities!
ReplyDeleteWow this card is so colorful. Love the rainbow effect you have given it:)
ReplyDeleteAwesome card and beautiful shading!
ReplyDeleteI love the subtle rainbow colors you incorporated into your card. Why, it's a-maze-ing!
ReplyDeleteWhat fun cards - thanks for the inspiration!
ReplyDeleteThank you for the tutorial. Nice card.
ReplyDeleteI like your color blending - cool! Great card!
ReplyDeleteSuper cute card! I can't wait to get my kit so I can make some A-maze-ing cards!
ReplyDeleteThis is fabulous!! That rainbow ink blending is so pretty!
ReplyDeleteYour blending is just to die for! I love the bold colors of this card! This kit is high on my wish list
ReplyDeleteI adote your CAS card with adorable details like Rainbow colors! This card kit is my favorite!
ReplyDeleteLove how these rainbow colors seamlessly blend into each other!
ReplyDeleteVery pretty card.
ReplyDeletewhat a super cool design!!
ReplyDeleteLove the blending of the colors.
ReplyDeleteGreat idea.
thanks for sharing.
Wow! Love your beautiful card!!!
ReplyDeleteI love how you made your own rainbow paper!! Great card!
ReplyDeletecool card.
ReplyDeleteLove! There's no such thing as too many rainbow cards!
ReplyDelete