
Hello!

I’m back today to share an interactive project that I created using several sets of Blueprints Die-Namics from My Favorite Things! If you don’t own any of the Blueprint Die-Namics sets, you’re really missing out! These sets of card building dies are amazing, and truly give you the tools to create beautifully constructed projects! The best thing about the Blueprints Die-Namics is that you can mix and match to create just about any kind of card that your imagination can dream up! Today, the My Favorite Things Creative Team is being challenged to create an interactive aspect to our projects using elements from the Blueprints Die-Namics! Here’s my project:

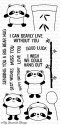
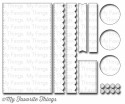
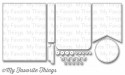
This project features the Happy Pandas Stamp Set, as well as Blueprints 6, 13, 23, and 24. The interactive part is the message behind the “secret door” – check it out!

How fun is that?!! Here’s how I created my project:
- Trim an A2, top-folding, vertical card base from Smooth White Card Stock. Score at 5.5”, fold it in half and perfect the crease with a Teflon Bone Folder.
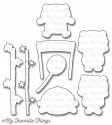
- Stamp the hanging panda from the Happy Pandas Stamp Set twice onto some Smooth White Card Stock using Black Licorice Hybrid Ink. Die cut one of the pandas using the Happy Pandas Die-Namics. Using detail scissors, trim out the face and arms of the second panda image, and adhere it to the die cut panda using foam tape.
- Die cut a bamboo branch from Limelight Card Stock using the die from the Happy Pandas Die-Namics. Adhere the bamboo branch die cut to the panda, underneath his head and arms, using tape runner adhesive.
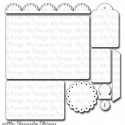
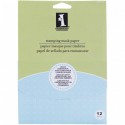
- Die cut an image panel from Smooth White Card Stock using the stitched rectangle from Blueprints 23 Die-Namics. Die cut another stitched rectangle from Stamping Mask Paper. Die cut a circle from the mask using the circle die contained in the Blueprints 24 Die-Namics. Adhere the mask to the white rectangle. Lightly blend some Tumbled Glass, Mermaid Lagoon and Mustard Seed Distress Inks. Before removing the mask, partially stamp the bamboo image from the Happy Pandas Stamp Set near the bottom of the masked circle using Limelight Hybrid Ink. Carefully remove the mask.
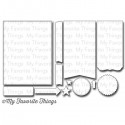
- Using the small rounded corner rectangle from the Blueprints 13 Die-Namics, die cut a sentiment opening from the image panel. Temporarily position and adhere the image panel onto the card base and stamp the sentiment (after performing a bit of stamp surgery) from the Fall Friends Stamp Set inside the sentiment opening, onto the card base, using Black Licorice Hybrid Ink.
- Using the scalloped tag from the Blueprints 6 Die-Namics, PARTIALLY die cut the top portion of the tag from Smooth White Card Stock. Move the die so as to extend the length of the tag, and partially die cut the end of the tag – you should end up with a longer tag. Thread some black and white baker’s twine through the hole of the tag and loop it to secure it. Tie a bow from more baker’s twine, and adhere it to the knot using a glue dot. Adhere a small piece of foam tape to the back of the bottom portion of the tag – but don’t remove the release paper. This will serve as the stopper for your “secret door.”
- Temporarily place the tag die cut on the back of the image panel so that the tag covers the sentiment opening but protrudes slightly on the left side of the image panel. Adhere strips of foam tape on either side of the tag to create a “channel” for the tag to slide in and out of. Also, adhere a small piece of foam tape to the back left edge of the image panel, near the sentiment opening – this will serve as the other half of the “secret door” stopper. Do NOT remove the release paper from this piece of foam tape. Add additional pieces of foam tape to the back of the image panel and adhere it to the card base, making sure to align it so that the sentiment is showing through the sentiment opening.
- Adhere the assembled panda die cut to the image panel with foam tape.
- Adhere aqua, green and black enamel dots to enhance the card.
There you go! I love looking at dies and coming up with ideas to make them work in unexpected ways! And I love creating unexpected and interactive aspects to a card – I think my “secret door” opening definitely fulfills my card making adventures today! I’ve listed all of the products that I used below. Please click on through to the My Favorite Things Design Blog to be linked to the other projects that my sweet teammates have created to inspire your interactive creativity using Blueprints Die-Namics!
That’s it for me today, my friends! I’m spending the day in my craft room, trying to get caught up on some more crafty deadlines, as we’re headed to Mexico for a long weekend at the end of the week. Lots of things to get done before we go! But I’ll be back soon with more crafty goodness – I hope you’ll come back then! Thanks so much for stopping by today – I sure do love it when you do!
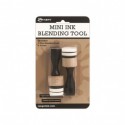
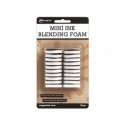
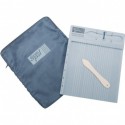
PRODUCTS USED:


No comments:
Post a Comment