Showing posts with label Inlaid Die-Cutting. Show all posts

Saturday, June 5, 2021

My Favorite Things - June Release Countdown Day 3

Hello friends!


Welcome to the My Favorite Things June Release Countdown Day 3! I'm dropping in today to share a project that I created using the new Graphic Roses Die-Namics! It's an amazingly detailed die that provides a lovely outline, and allows for some time-consuming but super fun inlaid die cutting! I sat down in front of my favorite binge show and went to town!


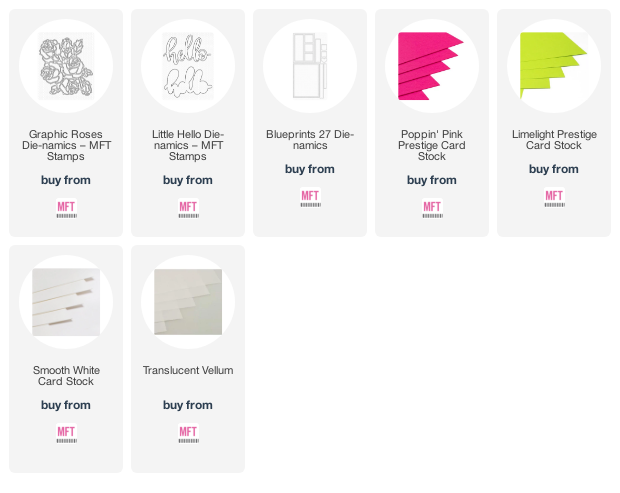
I die cut the Graphic Roses Die-Namics three times - once from Smooth White, once from Poppin' Pink and once from Limelight! I used the white layer as the foundation for the inlaid die cuts, doing my best to secure the inside die cuts to the outline using tape. And then I removed the individual Poppin' Pink and Limelight pieces and inlaid them to create the final cluster of roses! I trimmed out a main panel from Smooth White and adhered the assembled rose cluster using foam squares. I die cut the Little Hello Die-Namics from Poppin' Pink and Translucent Vellum, adhered the two layers together with liquid glue, and then adhered the assembled die cut to the image panel using more liquid glue. I adhered the main panel to a stitched scalloped rectangle that I die cut from vellum using Blueprints 27 Die-Namics. And then I adhered the assembled panel to an A2, top folding card base made from Limelight card stock! I am amazed at the incredible detail of the Graphic Roses Die-Namics and look forward to playing with it more! I've listed and linked all of the MFT Products that I used below (although the links to the new products won't be live until the release.)

Please click on through to the MFT Design Blog to be linked to the rest of the incredible projects that my teammates have created for your inspiration using today's featured release products! And while you're there, be sure and leave a comment for your chance to win a $75 Gift Voucher to the MFT Online Boutique! One random winner will be chosen for each Countdown post, but you can't win if you don't comment! All of the June Release products will be available for purchase on Tuesday, June 8, 2021 at 10:00 AM EDT!

That's it for me today! I'll be back again tomorrow with another June Release Countdown project! Until then, have a wonderful day!

MFT PRODUCTS USED:

Monday, August 12, 2019

My Favorite Things - Camp Create: Session 2 - Inlaid Die-Cutting Made Easy!


Hello friends!


It's time for Session Two of Camp Create, and I'm today's camp counselor, here to share with you our first activity for this session!  We're talking about Inlaid Die-Cutting, and my plan is to share some basic tips and tricks and a little bit of inspiration to get you started.  Inlaid Die-Cutting is a super simple way to add depth and dimension with die cuts without the bulk that typically comes with multiple layers of die cuts!  Here's a quick peek at the project I'm sharing!


But let's not get distracted - click on through to the MFT Design Blog to check out the details of today's activity, as well as a process video showing you how I got this multi-layered look using the inlaid die cutting technique!  Of course, there are AMAZING prizes to be won, especially if you participate in all five days of Camp Create: Session Two!  All of those details can also be found on the MFT Design Blog.

That's it for me today, friends!  I'll be back very soon with more crafty goodness!  I can't wait to see what you all create for today's activity, and the other activities this week!  Thanks for stopping by, and have a great day at Camp Create!

MFT PRODUCTS USED:


Sunday, January 6, 2019

My Favorite Things–January Release Countdown Day 2!

Hola!

Print

Aaackkk . . . we’re almost to the release date!  Can you stand the wait?!!  I’m dying, and I’ve already seen the January release!  I can’t even imagine how crazed you all are!  I’m back today with another project, this one featuring the new Hearts Entwined Die-Namics and the Sweet Nothings Stamp Set!

KKL_JAN0619-CD-Day-2

Once again, I’ve paired those amazingly fun Hearts Entwined with some rainbow smeared alcohol inks behind the negative of the die cut.  The sentiment is from the new Sweet Nothings Stamp Set, and is stamped onto some Black Licorice Card Stock using Sweet Tooth Pigment Ink, and then heat embossed with White Embossing Powder.  I’ve listed and linked all of the products that I used below (keeping in mind that the links to the January Release products will not be live until the release.

Please click on through to the MFT Design Blog to be linked to the other spectacular projects that my teammates have created for you! While you’re there, be sure and leave some love along the way for your chance to win a $75 Gift Voucher to the MFT Online Boutique!  There’s a random winner for every day of the Release Countdown.  All of the January Release products will be available for purchase on Tuesday, January 8, 2019 at 10:00 AM EST.

Thanks so much for stopping by today!  I sure do appreciate the time you spend here with me.  I’ll be back again tomorrow with one more countdown project, so I hope you’ll stop by again real soon! Have a great day!

PRODUCTS USED:

Monday, September 3, 2018

My Favorite Things–September Release Countdown Day 1!

I’m baackkkk!!

Print

As promised, I came back to share one more countdown project before the September Release goes live tomorrow at 10:00 AM EDT!

KKL_SEP0318-CD-Day-1

Today’s project features several new products – the Bundle of Balloons Stamp Set and coordinating dies, as well as the Happy Birthday Script Die-Namics!  Oh, and that yummy glitter paper is new, too – it’s the Mermaid Glitter Cardstock Collection!  I’ve listed and linked all of the products that I used below.

Please click on through to the MFT Design Blog to be linked to the other spectacular projects that my teammates have created for you!  While you’re there, be sure and leave some love along the way for your chance to win a $75 Gift Voucher to the MFT Online Boutique.  As mentioned above, all of the September Release products will be available for purchase tomorrow, September 4, 2018, at 10:00 AM EDT!

Thanks so much for stopping by today!  I so appreciate the time you spend here with me, and look forward to every single visit!  I hope you’ll come back tomorrow for the New Product Launch!  Have a great day!

PROUCTS USED:

Tuesday, January 19, 2016

My Favorite Things–Beautiful Blooms Card Kit Release!


MFT_BeautifulBlooms_BlogHeader January 16 Card Kit

It’s time!!  The new My Favorite Things Beautiful Blooms Card Kit for January is finally available tonight!!  You can find it HERE in the My Favorite Things Store NOW!!

KKL_JAN1916-January-Card-Kit-Release

I’m popping in to share one more project that I hope will inspire you to give this new kit a try!!  It’s seriously an amazingly beautiful conglomeration of MFT products that will set you up to create right outta the box!!  No joke!!  My project today features a bit of inlaid die cutting to show how versatile the Beautiful Blooms Stamp Set and coordinating Die-Namics really are!  Here’s how I created my project:

  1. Trim an A2 vertical top-folding card base from Sweet Tooth Card Stock.  Score it at 4.25”, fold in half and perfect the crease with a Teflon bone folder.
  2. Die cut an image panel from Sweet Tooth Card Stock using the Wonky Stitched Rectangle STAX Die-Namics.
  3. Using a MISTI, position the sentiment from the Beautiful Blooms Stamp Set onto the image panel, and stamp it using Black Licorice Pigment Ink.  Heat emboss it with Clear Detail Embossing Powder.  Leave the stamp in place and stamp it again onto a scrap of Sweet Tooth Card Stock – heat emboss it with Clear Detail Embossing Powder.
  4. Die cut the sentiment using Blueprints 6 Die-Namics.  Adhere it to the card base with foam tape, making sure to align it with the stamped image panel.
  5. Die cut the vases from the Beautiful Blooms Die-Namics once each from  Lavender Fields, Berrylicious, and Wild Wisteria Card Stock.  Die cut the middle vase from all  three colors.
  6. Stamp the vase die cuts with the Linen Background Stamp using VersaMark Ink.
  7. Again using the vase dies from the Beautiful Blooms Die-Namics, die cut them so that each die overlaps and cuts out a portion of each die cut.  Arrange the pieces so that the three colors are represented in a balanced fashion.
  8. Position the vine from the Beautiful Blooms Stamp Set onto the image panel so that it aligns with the middle vase.  Stamp it onto the image panel using Gumdrop Green Premium Dye Ink (provided in the kit).
  9. Assemble the die cuts and adhere them to the image panel with foam tape, making sure to align the middle vase with the stamped vine.
That’s it!  Another super easy project that helps you to stretch those stamps and dies to get lots of great use out of them!!  I’ve listed all of the products that I used below.  I hope you’ll click on through to the My Favorite Things Blog to be linked to the other amazing projects that my uber talented teammates have created for your inspiration!  I really think you’re going to love it all enough to add the Beautiful Blooms Card Kit to your shopping cart – you seriously can’t go wrong considering the contents and the great value!

That’s it for me today, sweet friends!!  I’ll be back again tomorrow (it’s a super busy week here on my blog!) with another creative project to share with you all!  I hope you’ll drop by again soon to check it out!  Thanks for stopping by today – it’s the best part of my day when you do!