NOTE: Please be aware that the hyperlinks to the A-maze-ing Card Kit will not be active until Tuesday, April 18, 2017 at 9:00 PM EDT, when the kit will available for purchase!
Well, hello!!
I’m back again today to share another project featuring the soon-to-be-released A-maze-ing Card Kit from My Favorite Things! Today, I decided to make my card interactive by adding one of the spheres and the circle shaker pouch, both of which are included in the kit!
The kit includes everything you need to add this interactive puzzle embellishment to your cards and projects! And It’s so stinkin’ easy!! Here’s how I created my project:
- Trim a 10-1/4” x 3-7/8” card base from Smooth White Card Stock. Score at 5-1/8”, fold in half and perfect the crease with a Teflon Bone Folder.
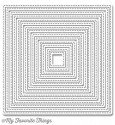
- Die cut an image panel from Smooth White Card Stock using the Inside & Out Stitched Square STAX Die-Namics.
- Stamp the sentiment from the A-maze-ing Stamp Set onto the image panel using Black Licorice Hybrid Ink.
- Die cut the circle opening from the center of the image panel using the A-maze-ing Die-Namics.
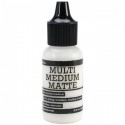
- Temporarily position the die cut image panel onto the card base, aligning it with the top edge. Use the circle opening as your guide and adhere the black maze shape to the card base using Multi Medium Matte liquid adhesive. Place a maze sphere into the maze.
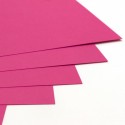
- Die cut some double sided adhesive using the circle frame die from the A-maze-ing Die-Namics; die cut some Ripe Raspberry Card Stock using the same circle frame die.
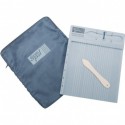
- Adhere the die cut double sided adhesive to the back of the image panel around the circle opening. Remove the release paper and adhere a circle shaker pouch to the image panel.
- Adhere the Ripe Raspberry circle frame to the image panel using foam tape.
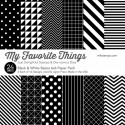
- Adhere a strip of black and white striped patterned paper (from the Black & White Basics 6 x 6 Paper Pack) to the bottom edge of the card base using tape adhesive.
- Adhere the assembled image panel to the card base using foam tape.
Again, another easy yet fun and impactful result!! How fun would it be for your recipient to receive this in the mail and get such a kick out of trying to get that little round ball into the center circle! And the best part is, they can do this over and over again!! It’s the card that keeps on giving! LOL Please click on through to the My Favorite Things Design Blog to be linked to the other genius designs created by my sweet teammates! You’ll be A-Mazed!! LOL I’ve linked and listed all of the products that I used below. The A-maze-ing Card Kit will be available for purchase on Tuesday, April 18th at 9:00 PM EDT!! The hyperlinks to the kit won’t be active until then!
That’s it for me today! I’ll be back again soon with my final A-maze-ing Card Kit project! I hope you’ll drop by then – and thanks for stopping by today! I so love it when you do!
PRODUCTS USED:




6 comments:
Love your card and thanks for the detailed directions! I will be making this beautiful card!!!
Striking color combination that shows off the maze!
What a Great Card. Love these colors together. TFS!
Love this Karolyn. The black maze looks awesome with the b/w stripes and that pop of pink is amazing on it.
Love your card Karolyn. One can never go wrong with black and hot pink.
Ooo pink and black are my fav! So cute!
Post a Comment